

The question got a whopping 521 replies. What a hot topic! I read through a lot of them. I mean, hey, it’s summer and the sun is shining. What else is an ML Engineer to do? The answers were pretty wild I thought, here are a few examples:
- “Use miniconda”
- “Docker 😛”
- “There’s no right way, it will get f***ed beyond repair somewhere down the road regardless”
- “The right way is to don’t and ssh to a remote server with Linux and GPUs”
- And lots and lots of crazy stories of people who just use Python until it stops working. Some of whom even have to reinstall their entire MacBook when it breaks. Yikes!
- One guy even had to get a new life and identity, with that vacuum seller guy from Breaking Bad, after breaking his Python.
So what is the right way to install Python on a MacBook? Luckily I saw the right answer pop up quite a few times in the replies as well.
Pyenv + pyenv-virtualenv
You read that right, this is what you want: pyenv has emerged as an indispensable tool for Python developers, primarily because of its capacity to manage multiple Python versions seamlessly on the same system. This functionality proves invaluable for developers juggling various projects, each demanding its unique Python version. What sets pyenv apart is that it allows developers to pin a specific Python version to a project, ensuring unwavering consistency in the project’s Python environment — even when sharing work with collaborators.
Another advantage of pyenv is its user-centric design. Traditionally, installing global packages might require sudo permissions, potentially altering the system configuration. However, pyenv installations and packages are nestled safely in the user’s directory, keeping system-wide settings untouched. This ensures that pyenv doesn’t meddle with the system Python — a crucial feature since many system utilities are intertwined with the default Python, and altering it can usher in a myriad of problems.
[

The pyenv-virtualenv plugin on top of things is the cherry on the cake. It augments pyenv by weaving in virtual environment (virtualenv) capabilities. This synergy allows for meticulous dependency management on a per-project basis, avoiding any package version conflicts. Such isolation offers another layer of protection against system updates that might modify the system Python or its associated libraries. With pyenv, your projects remain insulated from these shifts, preserving their stability.
Switching between Python versions is an area where pyenv shines. With just a few commands, developers can toggle between versions — be it globally, per session, or per project. Additionally, the wide array of Python versions pyenv offers is impressive! From the standard CPython to the Java-based Jython or the JIT compiler-based PyPy. It gives developers a rich palette of Python implementations at their fingertips. I mean, as a data scientist and ML Engineer I don’t really need these, but still, fingerlickin’ good!
For those in the realm of Python development, pyenv serves as a robust and flexible companion. Whether it’s for maintaining consistent project environments, testing across various Python versions, or simply keeping projects isolated from system changes, `pyenv` stands out as the top choice.
So how do we get there?
1. Install XCode Command Line Tools
The first step is to install the command line tools for mac. This includes all kinds of useful stuff for developers, such as a C compiler. You can also use the app store to install it, but you’re a developer now. So we’ll be doing things from the command line in this tutorial.
xcode-select --install2. Install HomeBrew
Next, install HomeBrew — the open source package manager for mac. Browse to
https://brew.sh/ and copy and run the command at the top of the page. It should look something like:
/bin/bash -c "$(curl -fsSL https://raw.githubusercontent.com/Homebrew/install/HEAD/install.sh)"Note that HomeBrew does not automatically update itself nor any of the packages installed. Do this yourself once in a while by executing:
brew update
brew upgrade
3. Install Pyenv
Pyenv is a package manager specifically for python itself. It allows you to install multiple versions of python on one machine. The pyenv-virtualenv plugin helps create virtualenvs for a specific python version.
brew install pyenv pyenv-virtualenvI’m a Z Shell (zsh) user, so this step is a bit specific. Why zsh over regular bash? Well, you can see a comparison here and decide for yourself. In short: more features. The drawback is that your commands locally can differ from the ones needed on your cloud deployments, where you might have to deal with just regular bash. But I digress
For this step below make sure you properly initalise pyenv and pyenv-virtualenv. In order to do this in zshell, place the following lines in .zshrc in your home directory.
eval "$(pyenv init -)"
if which pyenv-virtualenv-init > /dev/null; then eval "$(pyenv virtualenv-init -)"; fi
Next, restart all your terminals to ensure pyenv is initialized.
4. Install your desired version of python
Great, you now have pyenv + pyenv-virtualenv! Let’s get some python, no, let’s go crazy, let’s go all kinds of versions of python. Just because we can! But we’ll start with one. To see what’s on offer you can list all available python versions by running.
pyenv install -lNote that the base versions (denoted by just a number) are listed at the top. Also note that newer versions only become available when you upgrade pyenv (see updating HomeBrew and its packages above).
Install your favorite version of python with the command below.
pyenv install 3.12.0Substitute 3.12.0 for your desired version here of course. You can have multiple versions installed simultaneously by using this command. No worries mate!
5. Create a virtualenv
Change directory to the root of your project. Decide which version of python you want to use. Have a look at which version you have installed and are available to you.
pyenv versionsYou should see the version or versions here that you chose to install. Next you can create a virtualenv with a version of choice. I usually have identical names for my projects, repositories and virtualenvs. I like to keep a clean 1 virtualenv per project / repository. This allows me to easily manage my dependencies.
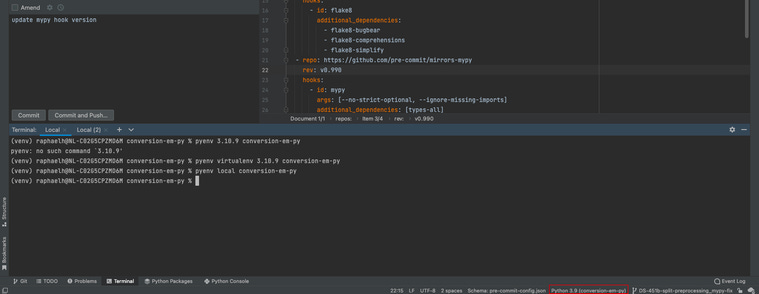
pyenv virtualenv 3.12.0 myprojectThis will create a virtualenv named “myproject” with python version 3.12.0. Next, activate the environment for your project by running.
pyenv local myprojectThis will create a file named .python-version that contains the name of the virtualenv. Make sure to never commit this file to git! Now, your prompt should probably start with (myproject), unless you have configured your terminal in some funky customized way.
Deleting environments
If you want to delete a python environment use the project name as an argument in the following code.
pyenv virtualenv-delete myprojectCarefree be your days!
There you have it. No more burning MacBooks, because you needed Python. And I don’t want to hear the name of that other snake ever again. The one that shall not be mentioned. Happy carefree coding everyone!
Do I really need this?
But, but, I am just a data scientist who wants to run their notebook? Why all this command line stuff? Ahhh, but there’s the beauty of it all. Even across your notebooks you want to manage your dependencies well. This not only ensures seamless handover for deployment, but also keeps your code working. My advice would be to have a separate project / repository for each data science solution and give it its own environment like mentioned above here (you can still have multiple notebooks per solution of course).
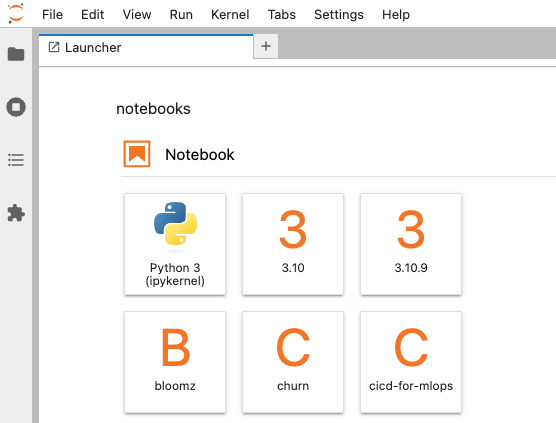
Just install Jupyter Lab in each environment, launch it from the command line using `jupyter lab` and you will find that Jupyter Lab will detect your available environments and let you pick one.
[
Beautiful! Want to be smart and efficient and use one environment across multiple projects? Don’t do it.
You might not want to re-download all packages for each separate environment, because you’re behind a slow connection or pay as you use. That’s fair. I would then recommend to keep local copies of your most used packages, but still run separate environments.
[

Bonuscontent: switch to pyenv interpreter in PyCharm
Bonus content and bonus controversy; this guy uses pyenv-virtualenv AND PyCharm? Yeah baby, read and weep. Or meet me in the comments section 🤠
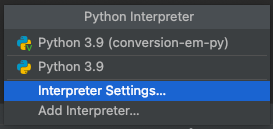
Click your python version in the bottom navigation menu, below your tabs even (standard location)
[
Now choose Interpreter Settings…
[
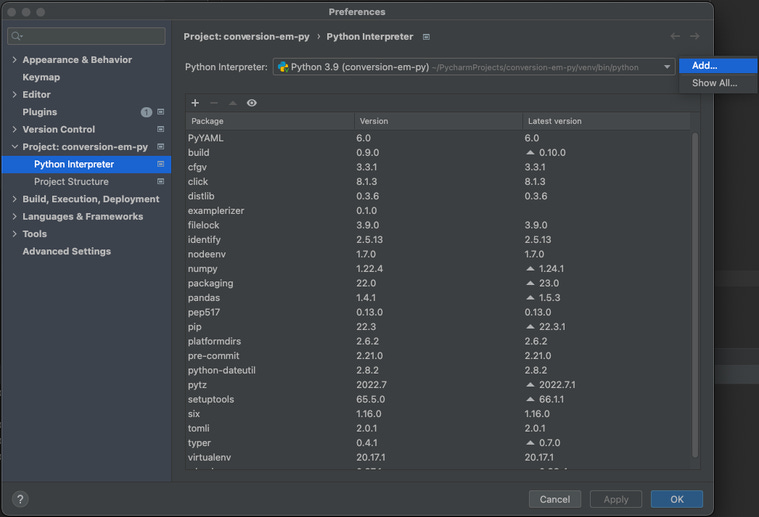
In the following menu click the settings wheel behind Python Interpreter and choose Add…
[
Now click the … button behind Existing environment
[

Here it gets interesting, so many pythons to choose from!!! Which one are you picking today?
[

In the file browser that is called `Select Python Interpreter` navigate to `./Users/
[
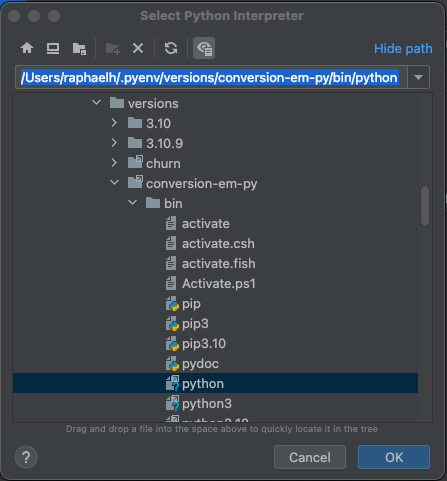
…and click OK, OK, Apply, OK. You should now be back in your IDE’s main work area!
Note: the name of your project corresponds to the name you have used above in the command
pyenv virtualenv 3.10.9 myprojectSo in the example below it’s conversion-em-py
[
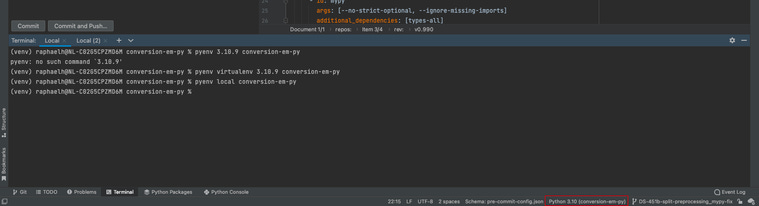
Check if you switched to the right environment by looking at the button below in your IDE!
That’s it, you are all set!
Thanks for reading Marvelous MLOps Substack! Subscribe for free to receive new posts and support our work.
Subscribe
7
Share this post

The right way to install Python on a Mac
marvelousmlops.substack.com
Copy link
Note
Other
[
Share
](javascript:void(0))
Previous